How to Achieve Astrophotography Painlessly
|
Lesezeit 3 min
|
Lesezeit 3 min
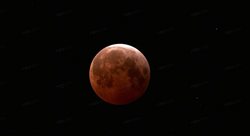
Capturing photos of the distant sun, moon, Milky Way, galaxies, and nebulae—aka astrophotography—is an exciting endeavor. However, the final results may not always meet expectations, as astrophotography is a complex process that requires some skill and patience.
Firstly, you need to invest in some equipments, which can be quite costly.
If you are a novice in photography, you might get lost in the various astrophotography camera knowledge. Full-frame cameras, APS-C cameras, medium format—you need to understand which one you need.
Then, you'll find multiple well-known brands within each type, and you have to research camera parameters such as aperture, shutter speed, and ISO.
Finally, you'll have to spend between $500 to $1000, or even more, to purchase a camera.
If you are familiar with the above, you can skip to the next step—adding a tracker or equatorial mount to your camera. Since the Earth spins rapidly, we need long exposure for photography, and your camera needs to move in sync with the stars to prevent them from appearing as blurry trails in your photos, and you can't do without a tripod. At this step, you might need to spend an additional $300 to $600.
Everything is ready, and you need to install and set up your camera and tracker. You need to focus the camera and align it with the tracker. If you are not used to doing this, it is best to practice during the day.
Astrophotography at night requires a basic understanding of camera ISO settings and the process of taking long-exposure images. Once you understand these astrophotography settings, you may also need to use some star chart software to help you indicate the best shooting times and directions.
It's best to also bring thick clothing and insect repellent because you have to wait patiently for the shooting results in the cold night or in the sultry weather.
Does the whole process sound cumbersome and daunting? If everything goes well and the final astrophotography photos are good, it is gratifying. However, if one or several steps go wrong in this process, the final result is likely to be frustrating.
In fact, with the development of modern technology, the above shooting process can be greatly simplified. This is thanks to the emergence of smart telescopes, which are also accepted by more and more astrophotography beginners and enthusiasts.
What is a smart telescope? A smart telescope is a digital telescope that combines a telescope, camera, and tracking mount with a motorized, computer-controlled mount that can be controlled wirelessly with a smartphone or tablet app, making it easy to capture celestial bodies.
Among them, the DWARF 3 from DWARFLAB is a leader in smart telescopes. You might not imagine that the DWARF 3 is only 1.35kg, making it the most lightweight and portable smart telescope on the market. You can easily take the DWARF 3 to any place, so going to the suburbs or taking the DWARF 3 to shoot stars during a trip is a pleasant thing.
Why is the DWARF 3 smart telescope becoming more and more popular? Because it makes astrophotography simple, allowing more people to start touching and falling in love with exploring the universe.
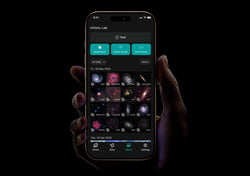
Compared with the traditional astrophotography method introduced above, the DWARF 3 smart telescope is quite simple to set up and operate. You just need to download the DWARFLAB app, then open the app and connect to the DWARF 3, and you can start astrophotography on the mobile app. The DWARFLAB app interface is simple and easy to understand, with built-in star chart functions, and it recommends the best shooting celestial bodies of the day. You just need to follow the prompts, click on the app a few times, and you can achieve shooting.
Because it can be remotely controlled, you can control the DWARF 3 in your backyard from the room, or comfortably in the tent, control the DWARF 3 outside. Even in a city with light pollution, you can use the three built-in VIS, astro, and dual-band filters of the DWARF 3 to achieve deep space celestial body photography in the urban light pollution environment.
In addition, the DWARF 3 smart telescope can also shoot the sun during the day and track moving objects, so using the DWARF 3 to shoot flying birds is also a surprising pleasure. You can also use the DWARF 3 to shoot panoramas, which is very suitable for shooting spectacular natural landscapes and scenic spots.
The DWARF 3, which integrates astrophotography, tracking, and panoramic photography, is priced at only $479. Want to know the parameters, functions, and detailed introduction of DWARF 3? Please visit the DWARFLAB official website.
Verwandtes Produkt
€529,00