The steps are as follows
I. Connect DWARF II via wireless Bluetooth with your smartphone.

II. Turn on Photo mode, try to make DWARF II focus on the distant city light as far as you can see, or the Moon.


Starpoints under successful focus, exposure in 1s.

III. Calibration.
Place DWARF II in a flat, open area with the rotation axis kept in its initial position. The pitch axis is 45-80 degrees toward the sky, ensuring DWARF II's view is not obstructed.

Switch to Astro mode, and follow the steps in the figures below.
① Astro
② Feature
③ Calibration
Wait three times for calibration. Under normal circumstances(without clouds and no other obstructions), it will take 1 min or so to calibrate and then pop up a reminder to show calibration success.

IV. After calibrating successfully, select our GOTO Target, M31 Andromeda Galaxy. Click "Confirm".

- DWARF II will calculate the target's coordinates, direct it to M31, and start to track the target star. If you get the image below, congratulations! Your GOTO succeeded. If it is not, no worries. Just repeat the steps.

- After you succeed in GOTO, change the exposure time to 15s, wait for the image update and check if there is a trailing.


If there is no trailing, you can start shooting. If there is a trailing, then wait for 1 or 2 minutes, and the trailing will disappear.
V. After star tracking is stable, set exposure time to 15s and gain suggested to 80-120, ensuring the background is not overexposured.
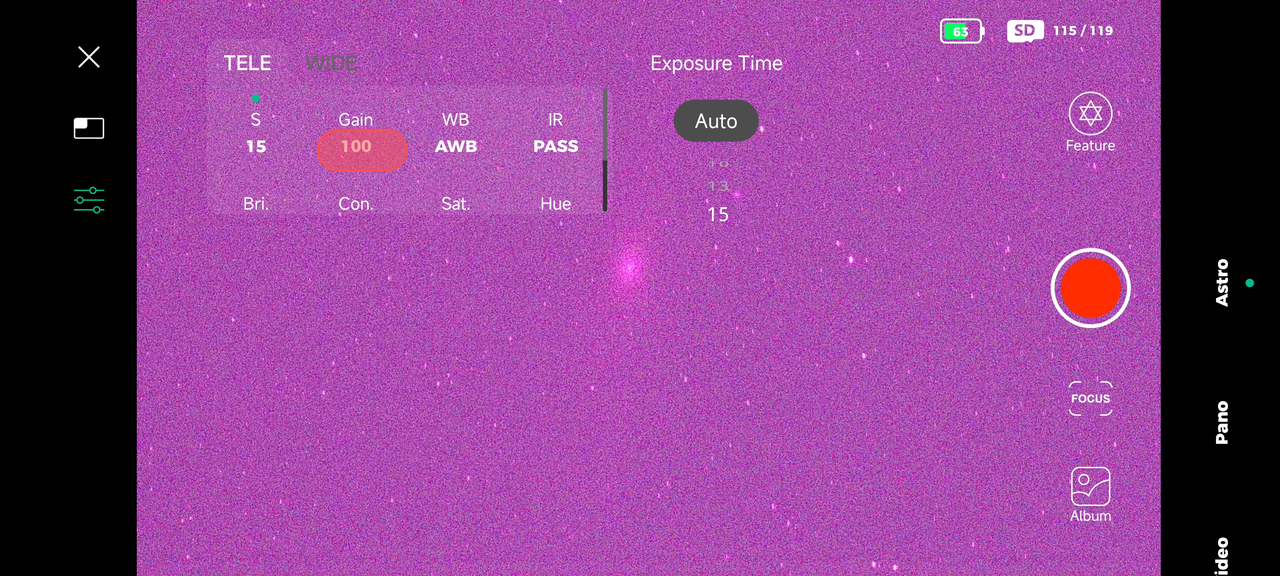
- After the parameters are set well, Click "Feature" in the upper right corner, then "MORE", and set the number of shots. Others are default. Click the red button to shoot, the top right corner of the screen will pop up the total number of shots, shot number and stacked number.

- Wait for 2 shots, and then the screen will display the live stacking image preview.
Manual adjustment of the colors. You can adjust the RGB channels and the overall brightness curve of the stacking image to make the deep sky objects more visible. Try and adjust each channel to fine-tune the image. If the image is not satisfactory, press Reset to restore it to the original one.

Notes
- Please check whether there are clouds in DWARF II's focus direction.
- Please note whether there are building obstructions in DWARF II's focus direction. It would lead to failure during its calibration and GOTO if DWARF II's views were obstructed.
- Please note the back and front sides of DWARF II. The side with a battery cap is DWARF II's back. Don't turn the lenses towards the backside, or the images will be upside down, leading to failure in GOTO.
- Manual focusing is a technical task. Locating the most precise position depends entirely on experience, learning the intricacies of the equipment, and the clarity of the night sky that particular evening. Like any new hobby, trial and error are the keys to mastering the skills to find the position where you feel the smallest star point is.
- If the GPS information fails to be obtained during the Calibration, please check whether the GPS location permission is allowed and try multiple times.
- Please note if DWARF II rotates to its limits while in its GOTO process. If it hits the limit, it won't be able to GOTO the target. Please rotate DWARF II's mount to recalibrate it and GOTO again.
- If the number of STACKED images does not increase while shooting the 15-second exposure Astro images, STOP shooting and do the following steps.
A. Check whether the background of the preview image is too bright under the current Exposure & Gain conditions. You can try to lower the gain and reshoot it.
B. Check whether your star is well-focused, as small as it could be under 1s Exposure and 100 Gain. If not, please focus on it once again and restart shooting.
C. If the amount of stacked images doesn't increase yet, even after confirming that the above two items are correct. Please try to ensure a stable shooting environment for DWARF II, such as a stable tripod, no wind or breeze, etc, and then restart shooting.